GIFs are a fun and effective way to present short animations or screen actions without creating full videos. Did you know you can create animated GIFs directly from PowerPoint — without Photoshop or any additional tools? In this guide, I’ll show you how I recorded my screen in PowerPoint, trimmed the video, and converted it into a high-quality GIF. Perfect for tutorials, social media, or even sending reaction “memes.” Let’s get started!
Step 1: Record a Video Using PowerPoint
First, we’ll create a short screen recording inside PowerPoint:
- Open a new PowerPoint presentation.
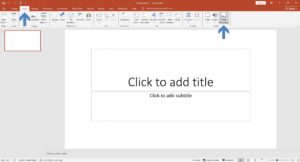
- Go to the Insert tab → Click on Screen Recording in the Media group.
- Select the area of the screen you want to record by dragging the cursor to form a red-dotted rectangle.
- Click the Record button in the control panel at the top of the screen to begin recording.
- To stop recording, press Windows + Shift + Q. The recording will be automatically inserted into your slide.
Note: You can record anything visible on your screen — a website walkthrough, a mouse movement, or even part of a video clip.
Step 2: Trim the Recorded Video
Once you’ve captured the screen recording, you may want to remove extra parts at the beginning or end:
- Click on the embedded video in the slide.
- Right-click and choose Trim from the context menu.
- Use the sliders in the Trim Video window to set the start and end points.
- Click OK to save your changes.
This step is useful for keeping your GIF short and focused on the action you want to show.
Step 3: Export the Presentation as a GIF
With your video in place and trimmed, now it’s time to convert your PowerPoint slide into a GIF:
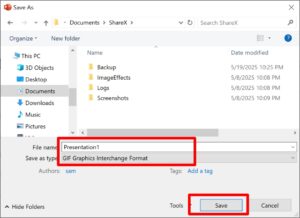
- Press F12 or go to File → Save As
- Click Browse to choose the destination folder.
- From the Save as type dropdown, select Animated GIF Format (*.gif)
- Click Save
PowerPoint will render your presentation (or selected slides) as a looping GIF. It may take a few seconds depending on the length of your video.
Check the Result
Open the folder where you saved the file, and double-click your new GIF. You’ll see that the screen recording you embedded and trimmed in PowerPoint is now playing as a looping animation — all without needing any third-party software!
✨ Final Tips
- Keep GIFs short — under 10 seconds is ideal for fast loading.
- Use fewer slides for quicker export time.
- Optimize for web by reducing dimensions if file size is large.
And that’s it! With just PowerPoint 2021/2025, you can create custom animated GIFs that are perfect for tutorials, social content, and more. Give it a try!